Creating a Happy, Colorful, Handmade Home & life on the shores of lake superior

October 10, 2012

Basement Update: Bandaid Solution for Crap Walls

I'm really happy so many of you enjoyed yesterday's spidery Halloween wreath because today's DIY is brought to you by the letter "L".  L for le sigh.

The basement was never a pretty place but I was so sure that when I removed the wallpaper, it would at least give us a nice, blank canvas.  The paneling we found beneath (darn you, whoever installed the paneling, then filled the gaps and friggin' wallpapered over it) was a little wonky but we were past the point of no return.  We barreled ahead with our spit and polish plan and got some textured paint.  I know, I'm sorry.  But the adjacent wall is already textured so we thought it might helped the paneled walls blend in.

It did.  But painting on that textured finish wounded my soul.

Post-wallpaper and pre-textured paint

After making sure no wallpaper residue remained, I let the wall dry overnight.  Then I applied the textured paint (FlexRock) using the requisite 1990s-Debbie-Travis-esque roller.  You have to be really random with the rolling.  No W's or V's.  

Warning: this paint is dense and heavy and droplets fly (it seems to aim for your eyes and any place you were lazy with the drop cloths) so, if you're jonesing for some textured walls, be really generous with the drop cloths and wear some dorky DIYer safety gear!


I waited two days for it to dry and then applied a coat of the same paint I'd been using for the other walls.  I wished I had done a second coat of texture-y goodness, but I just couldn't bring myself to do it. 


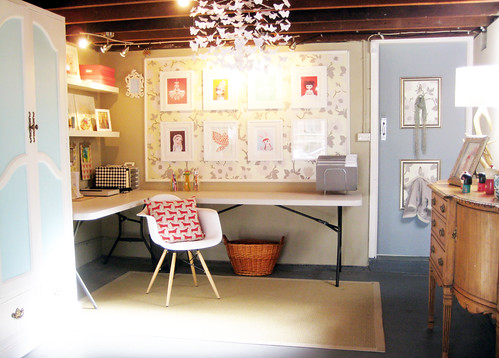
In the end, after all my crabby belly-aching, it looks . . . cute.  Especially with the little sumthin' sumthin' we hung on it . . . 


Even though the laundry room - the biggest part of the makeover - is still rough and the rest of the basement is a mess, with half finished projects everywhere, I tidied and started to decorate one corner.  It felt silly to have this one pretty corner, but it really motivated me to finish the rest when I come home. A "reveal" photo very soon!

Have you given your home any bad design medicine?  Something you hated doing but ultimately looked better?
SHARE:

February 24, 2012

First Basement Update: Paint on Walls

I promise not to post an update about every miniscule detail of the basement makeover.  We work slowly and are easily distracted (especially since I now have so many great ideas for the fireplace mantle).  If I posted real-time, it would look like a less exciting version of this:

Day 1: Painted stairwell for five hours, got paint in hair
Day 2: Painted second coat in stairwell, got more paint in hair
Day 3: Gave up on painting, can't get paint out of hair
Days 4-9 Ditto
Day 10: Decided basement won't paint itself
Day 11: Started painting again
Day 12: More painting
Day 13: I hate painting, I quit
Day 14: Started painting in basement again
Day 18: Attacked by centipede, took well-deserved painting break
Day 19: Ignored basement, but then went to buy drywall supplies
Day 20: Put up drywall
Until the end of time: Put up drywall
Day 25: Put up drywall
Day 26: Drywall
Day 27: Movie day, screw the drywall
Day 30: Emptied laundry room
Day 35: Realized I forgot to do laundry before disconnecting washing machine
Day 36: Painted floors
Day 37: Painted floors
Days 38-100 Kept painting basement because it isn't done, I had just moved onto another task
Day 101: Crum, floor needs another coat
Day 102: Where is the washing machine? I can't remember where we put it

Sometime in 2013: Start decorating.

Gosh, I hope I'm being dramatic.  But it really did take me two FULL days to paint just the stairwell (and part of a third day to take down everything, putty and prime holes).  There was a lot of brushwork and not enough roller-work.  Plus, the extendable edger I bought was crummy, so I had to DIY my own extendable paintbrush:


And I really did get lots of paint in my hair.  I'm still finding paint streaks buried under the layers (how?!?):


This update, although not very striking (it's a plain beige-ish canvas now) is hugely exciting to me because it's the first bit of paint on the walls.  It has been started, and that's the hardest part of any job for me.  Even though I love to DIY, finding the time and energy can be a major challenge.

Ta da! (I tried to get photos of the new paint beside the white walls/trim, so you can see the contrast):


Because the basement will never be bright and airy (it has ONE tiny window and we cannot change that), I am going for warm and cozy, like a coffee shop.  So, like the all-white upstairs where we painted the ceiling and walls the same colour, the basement ceiling will also be this lovely beige-shade.  Yep, we're painting like this again.  Then I'm going to make the space pop with graphic black & white artwork, textiles and pops of colour (like my inspiration space).


It already looks so much better than the tired before.  Give me some time to spruce it up, and I'll be back with a real "before & after".


P.S. The colour is "glacial till," by Benjamin Moore and it is Brian Gluckstein approved:

Benjamin Moore
Read more »
SHARE:

December 16, 2011

Our Dirty Little Secret

I'm so glad everyone found yesterday's post funny.  At least once a week I giggle about how our all-white walls really look like the product of Mr. Bean's method and I figured it was time to let you all in on my joke.  And yes, I am definitely planning to paint the basement a colour soon.  Want a sneak peak?  Oh boy, I hate disappointing my lovely readers like this . . . I haven't actually picked the exact colour yet (I've wallpapered the basement in swatches) but this outdoor space from Prudent Baby is my basement inspiration:

Prudent Baby

Prudent Baby

Prudent Baby

Prudent Baby

Oh yeah.  I'm going taupe.  Anyone feel let down?  Come on, I promise it will be goooood.

I love everything about the space above: the taupe-y walls, the faded black & white textile, the weathered wood, plus the hits of icy turquoise and pink.  While a beige-y/taupe-y/grey colour isn't my first choice (it's white!) I think it's necessary because our basement has a beige carpet that I want to downplay.  I tried other swatches (pale turquoise, creamy yellow, dark grey, chocolate brown, vanilla ice cream white, etc.) but those colours either made the basement look dark (it has but one window) or made the carpet pop in a weird way.  White walls made the carpet look dirty.  Darn.  I think a nice taupe/beige will make the area seem cozy and inviting without being too much of a departure from the crispness of the rest of the townhouse.

Now for our dirty secret.  Our basement is hideous.  It's sad, tired, worn-out & ugly (we blame the former homeowners) but it's also cluttered and messy (that's all on us).  I don't want to show you . . . but I will:


Here's my inspiration for the laundry room which, I'm not gonna lie, might get a coat of white (yay!) or maybe a really saturated turquoise on the walls or painted floor.  It could be a place to really go wild and distract potential home buyers from the aged washing machine.

via Design&Sponge
Except my laundry room boasts a washer & dryer older than me

Our laundry room (it's amazing anything comes out of here cleaner):


Gosh, revealing that was terrifying.  But I think we can make it better (can we make it worse?!?) 

Here is our to-do list to make the basement presentable:

Main Area:
  • Buy a vacuum (we were using the one the previous homeowners' left in the garbage until it blew up.  I think I know why they didn't take it with them)
  • Clean (it's been hard to do, without a vacuum.  Man, I hate carpet)
  • De-clutter
  • Re-drywall areas
  • Paint walls, ceiling, trim, heaters, door
  • Make lighting less crappy
  • Sew curtain for lone window
  • Decorate!
Laundry Room:
  • Rip up carpet
  • Remove weird, falling down accordion door (not pictured)
  • Insulate
  • Install drywall and ceiling
  • Install baseboards and trim
  • Paint walls
  • Paint floors
  • Make lighting less crappy
  • Sew curtain to hide stuff
  • Install storage
  • Make a wall-mounted dry rack
  • Hang some art (art makes everything better)

We want to do this inexpensively because our basement is nothing special - not worth anything fancy pants, but it does need our patented spit & polish.  We're going to begin tackling this in January (and probably February, March and April) but I promise to keep you posted!  Now - go look at the townhouse tour so you remember we aren't messy slobs.
Read more »
SHARE:

March 29, 2011

Laundry Room Pondering

I put so few things in the dryer that I have a clothesline installed in our basement.  Makes the basement look so messy.  (Technically, it is retractable but the darn retractability broke.  Grrr).  The basement and laundry are long over due for an overhaul (and some drywall).  So, I've been ogling laundry rooms (and basements, in general) with more intensity, for inspiration.  I will work up the courage to show you our laundry room soon.

This lovely laundry room belongs to Elsa, from Casa Greer.  Just look at the clever rod installed so items can be hung up to dry!  I also appreciate that the laundry room doesn't even have a fancy new machine/dryer combo in it.

Photo via Made by Girl

Vic, the fabulous mind behind the lovely blog Ish & Chi, had a studio space similar to my laundry room but she transformed it into something amazing. 

Ish & Chi

Ish & Chi

Ish & Chi

Practical, feasible and pretty?  Sign me up.
Have you found a drool-worthy laundry room or basement?  I'd love to see!

P.S. I'll be internet-less for a few days.  But I'll be back online Friday.  Have an amazing week!
Read more »
SHARE:
© Dans le Lakehouse | All rights reserved.
See What Inspires Me on Pinterest