Creating a Happy, Colorful, Handmade Home & life on the shores of lake superior

February 6, 2018

Loving My Small Kitchen: Tips, Tricks and Storage Ideas


WARNING: This post contains some ugly, poorly lit photos of the guts of my kitchen. Viewer discretion is advised :) 
 
I have a pretty small kitchen.  It has a humble little footprint with only four lower cabinets and two of them are corner cabinets, which I loathe.  When we renovate for real I plan to reconfigure things for smarter storage, but for now I've done my best to work with the space I have.  I used to batch cook and coast on leftovers but Hubby and I have been cooking more than ever before - sometimes we cook all three meals in a day from scratch, with nary a leftover to be had.  No matter how much we use it, this kitchen puts the FUN in functional. 

If you've ever been curious about where I keep my stuff, here's how I organize things in my small kitchen - and how we make this small space work for us.


Step One: I Changed My Outlook

It makes me laugh that some of the bloggers who renovate reasonably sized kitchens into epic, commercial-grade kitchens, with miles of cabinetry, are sponsored by those mail order dinner prep services.  I really can't judge though, because if I could have a massive kitchen I totally would and I'd hoard all of the world's best vintage Pyrex and Cathrineholm.  Mwahahaha.

Instead, I have a small space, but I have totally embraced it.  The BEST cooks in my family prepared delicious meals in tiny kitchens.  When I traveled to Hungary, where many of my relatives grew their own food and prepared amazing meals from scratch, I couldn't believe what their kitchens looked like!  Kitchen cabinetry like what we have in North America isn't the norm in other parts of the world.  Many of the kitchens I saw were a combination of old appliances, a hodgepodge of antique hutches and a tiny stretch of counter space.  My friend Dora would whip up delicious crepes before we went out to the bars (she's European - guests must always be fed!) out of a kitchen that was barely larger than my powder room.  Comparatively, my kitchen is massive and I've learned to appreciate the space I have and focus on what I love: the view, the openness, the easy work triangle and the way it just beckons people - it's always the hub of any get together.  Hubby and I have also learned how to work effectively in here: one of us does sous-cheffing on the end on the counter, which is wide and spacious - with a great view of the lake - while the other bustles within the U-shape.   


Step Two: I Pared Down the Clutter

When we moved, I really de-cluttered - including bulky kitchen gadgets and glass serving ware.  It was amazing how many things I wasn't using but was hanging on to, just because I thought I should, like the ice cream maker, bread machine - even the microwave.  I get a lot of flak online for not having a microwave but we literally never turned it on, so it made no sense to keep it.  Rarely used items we couldn't part with are stored in the basement.  The kitchen is now filled with things we use and love on the regular, but I continually re-assess and pare down (especially because I do add things every now and then, like my Veggetti).  I also love items that do double duty, like vintage Pyrex that is hardy and cute enough for baking/cooking, serving, and storing leftovers.  That glass cake stand turns into a punch bowl and I have pretty cutting boards that double as trivets and serving pieces.   

We even pared down our food staples!  I used to have so many kinds of flour and snacks and miscellaneous dry goods.  Now, instead of five kinds of cereal, we have one.  Instead of a million boxes of flavored oatmeal, we have one canister of plain oatmeal that we add fruit and nuts to ourselves.  By paring down the selection, we no longer forget about random stuff that goes stale, which was an added benefit (I always stress about throwing away food). 
   
Streamlining was the first step, but after that I needed to figure out how to store the stuff I did keep.

Step Three: I Turned Cabinets into Drawers

Here's the BIGGEST change we made, that's been the biggest eye opener for us: we turned the cabinet to the left of the stove into two "drawers"!  These new drawers help us access things in the back so much more easily now.  I am obsessed with kitchen drawers!  You can get these pull out drawer organizers in different sizes and finishes and they are so easy to install.


Instead of rooting around for things, I can just open one of my new drawers and easily see/access everything.  It's helped maximize 100% of the tiny amount of cabinet space we have.   


Step Four: I De-canted Dry Goods into Glass Jars

You might have noticed that my drawers have neatly lined rows of Mason jars.  Oddly sized boxes and bags of dry goods were so awkward to store so I started decanting anything I could into the same size jars.  It makes it easier to pack more into our cupboards, plus everything is sealed really well to deter little buggies and keep everything fresher, longer. 

Step Five: I Created Makeshift "Drawers" From Bins

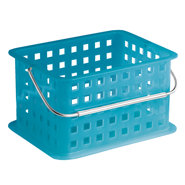
Across from these new "drawers" I have another cabinet and that's where I keep spices, canned goods, cooking oils, etc.  I use two plastic bins for spices and baking stuff which act like mini "drawers" and makes accessing that jumble so easy. 


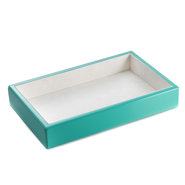
I keep my cooking oils, pepper mill, etc., on a plastic tray to save the inside of my cabinets from drips and make cooking easier.  (This tray is cute because it doubles for cooking/baking - it's oven safe!)  I just grab a spice bin (sorted by "savory" and "baking"), the oil tray and get cracking.


I do the same thing with baking ware (cookie cutters, flour sifter, powder sugar shaker, etc.), hot drinks (tea, tea bag filters, coffee, coffee stuff, what have you), magic bullet stuff, and Tupperware: they all go into big bins so I can slide out a bin and grab what I need without having to sift through mountains of teetering piles while I'm crouched awkwardly in front of these terrible corner cabinets.


I even corral pot lids into bins, so I can stack the pots easily and save space. 


Seriously, kitchen drawers (real or fake) are the way of the future.  A stackable set of bins, like this one, is another clever way to maximize vertical space in small cabinets.  

Step Six: I Added Open Shelving and an Open Pantry

The original upper cabinets were terrible: low, awkward, and deceptively small.  I couldn't open the cabinets to the right of the window without climbing onto the counter.  Between the wall mounted microwave and the fake cabinet above the stove, it looked like there was way more storage than there really was.  To make matters worse, the corner cabinets were really narrow and so I couldn't fit plates or mixing bowls in there.


Tearing the upper cabinets out and adding open shelving really added functional storage for us because we were left with nice, long shelves for uninterrupted storage of plates, glasses, mixing bowls, and casseroles - although I still wish we could have run the shelf entirely above the stove as planned (stupid building code).  That break in the shelving still bugs me.

Open shelving is really polarizing, but I shared my honest thoughts about them - including how I keep them clean - in this older post.  Although I will definitely (okay, usually) clean it first, I never style the kitchen for photos.  What you see is how it really looks - unless I'm in the middle of cooking, baking, crafting or re-potting plants, which are all tasks that I tackle here.  When I'm mid-task, it will look like a disaster but I always restore it to its tidy state when I'm done.  And yes, I use the stuff at the top, although admittedly I have way more Pyrex than I need for day to day.  I'm not bizarrely tall, but I guess I'm taller than average so I can grab stuff from the top shelf without a ladder - and I do.  Having pretty stuff that I use to cook, serve, and store food made this open shelving thing easy, but I've seen really eclectic open shelving that looks great too.  One day I'll have real cabinets again, but only if they go right up to the ceiling and actually offer up some storage.


In addition to swapping awkward cabinets for open shelving, what really gained us space was the floor to ceiling open pantry to the left of the fridge, which houses more serving pieces, our cooler for summer grocery trips, and also 12 massive jars for dry goods like cereal, flour, oatmeal, pasta, rice, quinoa, and marshmallows.  All of the staples, haha.


(We finally built a door for that lower cabinet, to hide the cooler, so I no longer have to crop this angle out of photos!)

Even if you don't want to swap cabinets for open shelving, if you're struggling with storage, adding a row or two of open shelves for dry goods storage in identical canisters, or putting a shelf under cabinets for plates and cute mugs, can help eek out a little more room in even the tiniest kitchen.  Plus it's so much fun to style and display stuff!

Step Seven: I Make it Pretty

Those massive food jars make cereal and flour look so good!  That's another trick in a small space: making things pretty.  Once things look nice, it becomes so much easier to store them in out-of-the-box ways.


Another example: by switching our mismatched and beaten up kitchen utensils for a brand new set of colorful KitchenAid utensils, I was able to put them on the counter in a cheap glass vase, where we can easily access them and free up drawer space.  That's the motivation behind picking as many pretty kitchen things as possible.    


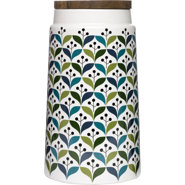
In a perfect world, I'd love to put everything away, but for our small space it works really well.  There are so many really pretty kitchen staples available these days, things that you used to only be able to get in black or white but that now come in ever color and style (and fancy finishes and materials), like this super cute turquoise drain rack for dishes.  Even just investing in a few large canisters for the counter, or setting up a convenient little coffee station and liberating a sweet mug collection from the cupboard, can help ease clutter in overcrowded cabinets and drawers.   

Step Eight: I Go Nutty for Small Bins Too

My flatware habit is where I get into trouble with this small kitchen.


I have two sets of flatware, which is such a waste of space.  I really want to track down more of the vintage silver set (which belonged to my grandmother) and sell the brass set or keep it with blog props in the basement.  I use typical standard cutlery organizing trays plus some extra long and narrow trays from the buck store to keep everything sorted.


There's one little sentimental vintage bin at the back of one drawer and that's where I keep random things I couldn't bear to part with: a pez dispenser, a few serving pieces I rarely use, some forks for road trips. 

Bins really let me cram way more in and keep things functional - I even use them in the fridge!


Step Nine: I Gave up the Junk Drawer

I gave up the kitchen junk drawer and bought one of these "Really Useful Box" storage systems, which I stash in the laundry room cupboard.  It keeps those odds and ends (like rubber bands, twist ties, random junk) organized and frees up a kitchen drawer, which is where I used to toss stuff like that.

Step Ten: I Make Use of Other Storage

We hung our DIY fauxdenza in the dining room, which is a handy place to keep table linens, candles, napkins, and the plates and glasses we use on the patio.  We used to keep stuff like that in the kitchen, but we had to re-think where we keep stuff when we moved here.  Leaning on other spaces for storage helps make our small kitchen feel much less small.  Just shuffling things around a little and keeping the kitchen storage focus on things we actually use in there helped a lot. 

 
I've tried to include a few brand new, up to date photos of the kitchen - and as many shots of my cutie pies as possible - to help counteract those gritty views into my kitchen cabinets.


Hands down my best ideas have been to make dry goods storage pretty by decanting nearly everything into the same size jars and to turn cabinets into drawers - those pull out metal organizers are my favorite purchase ever.  Really examining what we need and love, from kitchen gadgets to grocery staples, and only keeping the things we want made such an impact too.

As I think about our kitchen reno (which is all of the time), let me know your BEST kitchen storage tips in the comments!  I am always collecting clever ideas for cleaning and organizing - and I know you all have some of your own tips and tricks that I could implement when I get to start this kitchen from scratch... 
SHARE:

November 28, 2017

Decorating with Lowe's + a Peek into the Fish Room


Time for an embarrassing confession: for some reason, I have been agonizing over a clock for the bathroom since we finished renovating it!  I've scoured every local shop and big box store, and spent more hours than I care to admit scrolling online.

After all of that work, I carefully chose TWO clocks over the course of six months and neither were a good fit!  One had brass arms (how did I miss that?) and the other ended up looking cheap next to the expensive Kohler fixtures.  Both clocks found homes elsewhere in the lakehouse, but I was still clock-less in here and I NEED a clock in the bathroom.  Otherwise time feels like it stands still while I try to force some volume into my fine hair and when I finally emerge, coiffed and ready to take on the day, I've inevitably been in their 20 minutes longer than I thought I was.  Some kind of weird time wormhole exists in the bathroom (either that or I'm spending more time than I think I am, just admiring the turquoise sinks).

Happily, clock number three - the Ergo Bentwood Wall Clock, from Lowe's Canada! - actually does the trick.  You can't buy it online, so you'll have to pop into your local Lowe's to take a peek.

Just call me Goldilocks and the Three Clocks. 


From Lowe's Modern Nostalgia home decor trend collection, the bentwood frame is stained a rich hue that is close to the walnut cabinetry and the silver hands work perfectly with the brushed nickel finish I used exclusively in this renovation.  Plus it's BIG, so I feel like it's shouting the time at me and I need any extra motivation I can find to pry myself out of my cozy lakehouse. 

Now I have no excuse for being late!

Darn.

Although, speaking of clocks, I might need one in the fish room too, because that's where I'm storing all of my fabric, craft and paint supplies these days, so you know I'll lose a lot of time in there too.  I wrapped it up over the weekend so I just have to photograph it and then I can share the full reveal!  In the meantime, here's a sneak peek...


I had always pined for these Umbra Trigg Wall Vessels but had no justifiable use or purpose for them until we started decorating this odd little room.  This blank wall called out to me, but it wasn't really a spot I wanted to tuck any artwork because it's kind of hidden.  I decided three of the large wall pockets would be so cute, packed with some of our prettiest craft supplies, like these pale aqua scissors and some other gems.


You know my stance on brass, so I'm actually contemplating spray painting the metal frame a soft blue hue but I just haven't made the leap yet.  Maybe we can place bets on whether, when reveal day arrives, these wall pockets will still be brass or have the very Tanya-eqsue treatment of a blast of turquoise paint...

Any takers?

I was provided product and compensation by Lowe's Canada, but all thoughts and opinions are my own.  If you missed it, check out the gorgeous, hand waxed reclaimed wood mirror I picked up at Lowe's for my entryway.
Read more »
SHARE:

August 5, 2016

10 Tips + Products to Make Mornings Manageable (with Wayfair)

I am not a morning person.  I want to be, though, because I love those productive days when I'm up before the rest of the world.  I used to work with a woman who was up at 5:00am every day and by the time she came to work for 9:00am, she'd have run all her errands, read a book, set the slow cooker going, done a load of laundry...   

She always seemed relaxed.  And well coiffed!

Meanwhile, I'd wake up 15 minutes later than I needed to, crash around the house leaving a path of destruction in my wake, and arrive at work with 30 seconds to spare, sweaty from my 100 meter sprint from the parking lot and secretly wearing two different colored socks.

These days, I work from home a lot and with Hubby's weird schedule, we have a lot of chill mornings.  And some days I am a morning person!  But it's a lot easier when I'm not faced with a commute and getting ready in a hurry.  But then - bam! - I'll have to be somewhere for 7:00am (or earlier, ugh) and, between forgetting how to apply makeup, plus the hour commute, my morning runs the risk of feeling harried!

The only way I have managed to move past those days of mismatched socks and showing up places totally winded - with a speeding ticket in hand - is staying organized.  It makes my slow mornings at home better, plus I'm prepared for those days when I need to GET GOING NOW.  Getting organized just makes my mornings more manageable!


Here's what I do (and use) to make mornings more manageable:

 
Get Enough Sleep - 

This is something I'm working on!  Mornings when I haven't gotten enough sleep, I'm irritable and slow movingDays when I'm tired, holding the hairdryer seems like a Herculean task - has any one else ever had to set it down and take a break?  Days when I've slept enough, everything seems to go more smoothly!  I spring from my bed and seem lighter on my feet.  We all know that a good night's sleep is the key to so many healthy life goals, but sometimes it needs to be put on a list of things to do for me to do it!

Trim and Organize My Wardrobe -

Unless you wear a uniform to work - or you've tried a capsule wardrobe - you've probably had one of those mornings when you burn through a huge heap of clothes, trying to find something that fits and looks good.  I hate coming home to that kind of mess.  Spending a weekend and editing a wardrobe is the best way to make getting dressed in the morning easier!  I've gone from an XL to a S and although I have bought a few new garments, the budget doesn't really have room for a whole new closet of duds, so a lot of my clothes don't fit - or don't fit well.  Some can be made to look okay (add a belt!) but others need to be taken in.  I'm currently working on getting back to having a very edited wardrobe with only clothes that fit because it makes mornings so much easier!


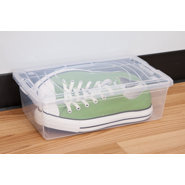
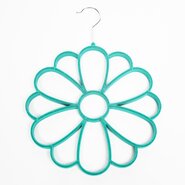
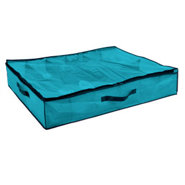
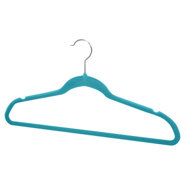
For now, keeping my closet organized helps a lot.  I use thin flocked hangers like these because they keep clothes from sliding off (and onto the floor, never to be seen again).  I used to color code, but now I sort best to worst fit, so everything that looks great is at the front and it goes backwards until the stuff that doesn't fit - but I can wear if I'm desperate - is at the back.  Things that need altering/ironing/mending, I stash in a bin under the bed so I don't forget and try to wear them!  I also have one of these hangers to keep my scarves tidy and easy to see.  Shoes are stored in clear bins so I can spot the pair I want and grab them quickly before I bolt out the door. 

Decide What to Wear the Night Before -

To make mornings even easier, I often check the weather and decide the night before what I'm going to wear so that doesn't hold me up in the morning.  I can be sure to have an umbrella handy or add a cardigan to my tote for those in-between days.  Or, if I'm being honest, extra deodorant for those sweaty days we've had recently (which I secretly love).  Plus I don't waste time picking an outfit in the morning - I even lay out my jewelry in a tray the night before!

Stay on Top of the Laundry - 

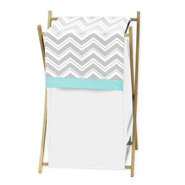
Because I have so few clothes now, I also make a point of staying on top of the laundry so that perfect top isn't languishing in the hamper for too long.  It helps me avoid that "I need that special tank to go under this top, which is my only clean top" problem that used to plague me so much!  I was terrible at doing laundry when we had a huge laundry room and I'd even forget I owned certain clothing items.  Now we have only two hampers so I do laundry regularly which means I'm actually wearing all of my clothes - and things are almost always ready to wear.

Keep Tabs on the Weather - 

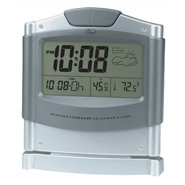
I check the weather the night before to see what I'll wear, but also to see if Mother Nature is planning on making life more difficult.  Will it snow?  Then I'll need to wake up an extra hour early to clear the driveway with the snowblower.  I have, before, woken up to a surprise snowstorm, been late, tried to blast through in four-wheel-drive, only to get stuck in the driveway and spend hours digging out my truck.  Will it rain?  I should stash my Hunters in the truck for later (as opposed to getting caught in the rain an hour from home and ruining my favorite flats).  Will it be below 15 degrees Celsius?  Better plug in the truck!  I check the weather and adjust my plans or alarm clock accordingly - we even have a wall clock now that reports the outside temperature!


Keep the Bathroom Organized -

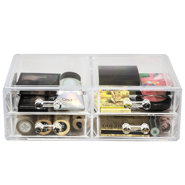
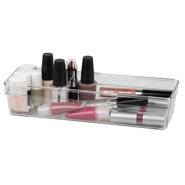
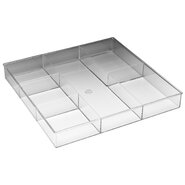
Our bathroom reno is finally done (photos coming Monday!), which has made my mornings much easier!  It's also given me a chance to organize everything, so what I need is close at hand.  My hair tools are stashed in a bin below the sink, my makeup in clear drawer organizers.  I sorted through everything and threw away anything that had expired, was awful (but I held on to it for whatever reason), or was used up and dried out.  It's easier getting ready when everything I grab is good to use and everything I want is easy to find in the drawer.  Even Hubby's drawer would make Martha Stewart proud...


Make Breakfast Easy -

We always have oatmeal in a giant jar and canned peaches in the basement, because even if we've forgotten to pick up almond milk or yogurt, I have an easy breakfast in a pinch (I don't love oatmeal enough to eat it daily, but I buy giant bags of it anyway).  I've gotten in the habit of keeping fresh fruit, like strawberries, hulled and sliced - ready to eat to speed up mornings.  I've got a repertoire of quick and healthy breakfasts that I cycle through, and I do as much prep as I can the night before (or choose simple things - like chia seeds and Greek yogurt).  Every now and then, baking (or buying) a yummy rhubarb cake the night before is a lovely way to start the day too...
 
Make Lunch and Snacks Easy Too -

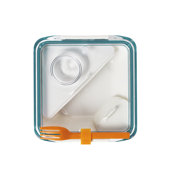
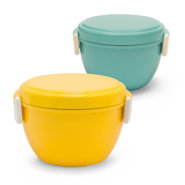
With breakfast taken care of, I also prep lunches and snacks the night before.  I bought a whole bunch of washable bento boxes and prep a variety of healthy meals for Hubby and I.  I also set aside some time each week and chop fresh veggies which I portion into reusable plastic containers - for lunch and dinner.  I'm much more likely to snack on some veggies if they're close at hand!  A meal planner really helps for breakfast, lunch and dinner too!  I'm sporadic about using one but, when I do - WOW, does my week every feel easier!


Give Everyone Jobs - 

I don't have kids, which makes my mornings easier, no doubt, but whether it's a household of two or ten, giving everyone jobs helps makes mornings more manageable.  Hubby and I never argue about who will take Szuka out because we have two week rotations - we do this for a lot of household chores, or we chat about it the night before.  Then we never have that "I though you were turning off the dishwasher" kind of hassle that ruins a perfectly good morning (and makes us do a U-turn on the highway to check).  Szuka has work, too: poop in a timely manner (thank you!) and then watch dutifully for any threats like the grader driving by or the geese moving menacingly toward our beautiful fire pit.

Make a Check List - 

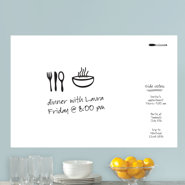
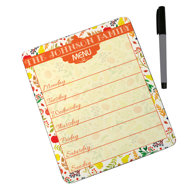
My Dad has imprinted the importance of a check list into my brain.  It's a simple thing to make and keep on the fridge (laminated is ideal - then a white board markers can be used on it):
  • Lunches? Check!
  • Szuka pooped? Check!
  • Hair straightener unplugged? Check!
  • Dishwasher turned off? Check!
  • Windows closed? Check!
  • Alarm on? You get the point

It sounds so silly, but it's those little things that trip me up.  So a checklist is a nice, no-brainer way to make sure the morning runs smoothly.  I'm a list maniac, so having a daily check list to make mornings easier is just another list I love to keep!

Those are my 10 tips - with some of the products I use and mentioned - that make mornings easier!

What are your tips for making morning manageable?  Do mornings run smoothly at your house?

Disclosure: This post was sponsored by Wayfair but all words and product selections are my own (no surprise there - they're all aqua!).   
Read more »
SHARE:
© Dans le Lakehouse | All rights reserved.
See What Inspires Me on Pinterest