Creating a Happy, Colorful, Handmade Home & life on the shores of lake superior

May 22, 2017

Quick + Easy Chocolate Orange Bark Recipe

Quick + Easy Chocolate Orange Bark Recipe

This deliciously quick and easy, orange-infused chocolate bark has an ulterior motive.

Last week I was in Ottawa for work and I tacked on a few extra days to my trip so I could visit my friend Ashley.  Since moving from Ottawa I've visited her every year but the gaps between visits widens as we both get busier, so I was so thrilled to capitalize on this opportunity to see her.  We always squeeze in some shopping and crafting (Exhibit A and Exhibit B), but spend most of our time just chatting and catching up.  She recently started selling doTERRA brand essential oils and I use a lot of essential oils in my crafts on the blog (like my DIY air freshener, my handmade soap experiments, and my pretty soy candles), so this time we chatted a lot about essential oils.  Because she's starting her own business, I shared my knowledge about connecting with people on social media, taking styled product photos and - of course - we brainstormed a ton of fun projects.  Ashley taught me all about the difference in quality between doTERRA oils and the (much, much) cheaper kinds of essential oils I've been using in my DIYs.  I learned about the true cost of making quality essential oils - especially when a company like doTERRA empowers growers and cultivates healthy working relationships. 

But I still wasn't sold on the massive price difference, so to demonstrate the quality Ashley whipped up this delicious chocolate orange bark using a doTERRA brand essential oil.

You can pretty much convince me of anything if there's chocolate or turquoise involved!

I had never in my life made chocolate bark, but it was so delicious that I wanted to share it with you.  If you're looking for a pretty dessert to whip up in two seconds flat, you might want to try this easy chocolate bark recipe.  It's simple to make but looks so fancy!  Here's what you need:


Quick + Easy Chocolate Orange Bark Recipe

Making this chocolate bark is too easy to even call this a recipe: simply melt the baking chocolate on low heat in a small pot, add 6 drops of orange essential oil and combine well, then pour into a rimmed baking sheet lined with parchment paper.  Let cool a few minutes and top with orange zest and shredded coconut.

Quick + Easy Chocolate Orange Bark Recipe

Pop into the freezer for a couple of hours and - ta da!  World's easiest dessert!  But it tastes phenomenal - dangerously addictive, with a very satisfying orange flavor. 

Quick + Easy Chocolate Orange Bark Recipe

I've only ever cooked/baked with extracts, not oils, so this was a fun experiment!  Have you ever tried cooking with essential oils?

I have so many more DIY projects in the bath and beauty realm I'm excited to try, so I'm definitely tempted to start splurging on better quality essential oils.  Until my conversations with Ashley, I didn't realize how many fillers and harmful contaminants were lurking in essential oils marketed as "pure". 

But darn it, the prices are so intimidating!  It makes sense though, if 30lbs of lavenders are what's required to make 15ml of oil...  Plus doTERRA reportedly has excellent relationships with farmers, who are paid fair wages and have healthy working conditions.  I will always pay more for a product if I know that the money goes to workers.  And, really, you need so little that a bottle really goes a long way! 

Quick + Easy Chocolate Orange Bark Recipe

If you're going to experiment with some essential oil recipes or DIYs, or pop some oil into a pretty diffuser to naturally add a fabulous aroma to your home, check the ingredients and quality of the essential oils you buy because some brands actually contain really toxic stuff.  If you've been intrigued by doTERRA and the concept of a high quality oil, I'd love to put you in touch with my friend Ashley, a new Wellness Advocate for the brand (the only way to purchase these oils - the "doTERRA" labeled products available on Amazon are knock offs).  It doesn't matter where you live in the world, she can set you up and she's just so, so knowledgeable about the products and company.  She has actually worked in health advocacy for much of her career, so she's especially interested in the health benefits of essential oils and uses them to enhance her family's wellness (like using certain oils as a decongestant for mild colds and diffusing calming aromas to help her family relax and unwind).   

Plus she'll ply you with goodies, so there's that added incentive...
SHARE:

December 16, 2016

Carrot Cake with Natural Wreath Decoration | Festive Holiday Baking

Carrot Cake with Natural Wreath Decoration | Festive Holiday Baking

One of my favorite things from the turquoise and orange brunch I shared yesterday is this decadent carrot cake.  Not only is the cake itself super moist and delicious, but I really love how the pretty "wreath" decoration on top turned out:

Carrot Cake with Natural Wreath Decoration | Festive Holiday Baking

For some reason, I've become really obsessed with beautifully decorated cakes - my Pinterest "Desserts" board is full of them.  I keep waiting for the perfect special occasion to go all out on some artsy homemade cake topped with piles of delicious candy and edible decoration (like this beautifully decorated cake or this one), but I just can't bring myself to do it!  Even though I'm treating myself during the holidays to some sweet treats, cutting back on sugar is always in the back of my mind and topping an already sweet cake with candy seems like a recipe for a stomach ache.  

For this dessert, I decided that I just had to add some holiday flair but, because the carrot cake was rich enough, I turned to the produce aisle in search of some decoration.  After topping my cream cheese icing with generous handfuls of unsweetened, shredded coconut, I used a package of rosemary, orange slices, and blueberries to create this pretty wreath topped cake.

Carrot Cake with Natural Wreath Decoration | Festive Holiday Baking

I LOVE how it turned out!

Wondering about the taste?  When it was time to serve the cake I removed the wreath and served the carrot cake plain and there was absolutely NO hint of rosemary flavor, even when the "wreath" sat atop my cake for a good three hours while I fussed with photos.  We even had neighbors over for a slice and they were SO enamored with the moist carrot cake recipe - no one detected even a hint of rosemary.  Unwilling to waste a delicious sprig, I set aside the rosemary for a slow cooker recipe (the coconut prevented any icing from sticking to it).

Carrot Cake with Natural Wreath Decoration | Festive Holiday Baking

Have I mentioned this cake is moist?  I snapped that photo of the slice yesterday (Thursday) but I baked it on Sunday!  It tastes so fresh, even after all of these days in the fridge.  Here's the recipe for anyone who is interested (and here's a link to my sugar-free carrot cake, which is also pretty darn tasty).

Carrot Cake Recipe:

This recipe makes the deliciously tall, double-decker carrot cake I made.
  • 2 cups sugar (now you know why it's soooo tasty
  • 2 cups grape seed oil
  • 6 eggs
  • 6 tbsp sour cream
  • 4-6 large carrots, grated
  • 3 cups flour
  • 3 tsp baking powder
  • 3 tsp baking soda
  • 2 tbsp cinnamon
  • 2 tsp nutmeg
  • 2 tsp ginger
  • 1 tsp vanilla extract

Pre-heat the oven to 350 degrees.

Beat the oil and sugar, then add the eggs and vanilla extract. 

In another bowl, sift the dry ingredients.  Add to the wet ingredient slowly, mixing well.  Stir in the shredded carrots and sour cream.

Pour into two 9" spring form pans and bake for 1 hour, or until a knife inserted into the center comes out clean. 

Cream Cheese Icing Recipe: 
  • 2 blocks cream cheese, softened
  • 2 tbsp butter, softened
  • 2 cups icing sugar

Beat the cream cheese, butter and icing sugar together until smooth.  I'm no expert at decorating a cake, but I have learned to wait until the cake has cooled completely before icing.  Place the first cake onto a cake stand or platter and apply a thin layer of icing to the top.  Place the second cake on top and press gently.  Then use a spatula to spread the icing onto the top and side of the cake.

Wintry Wreath Cake Decoration:

Sprinkle the top of the carrot cake generously with shredded coconut.  Using kitchen sheers, snip the rosemary into approximately 2" pieces.  Place the small sprigs in a circle shape, angling them ever-so-slightly so some face toward the center and some to the edge, tucking in the ends when possible.  Add orange slices or berries - imagine how pretty cranberries would look!

Store in the refrigerator, covered. 

Carrot Cake with Natural Wreath Decoration | Festive Holiday Baking

This was a delicious way to add a little festive, holiday flare to my cake, without adding more sugar!  For a leafier wreath, I recommend fresh peppermint - which was my second choice, but I loved the classic wintry look of "rosemary," which resembles evergreen wreaths.   This edible ivy is pretty cute too.

Carrot Cake with Natural Wreath Decoration | Festive Holiday Baking
Read more »
SHARE:

December 13, 2016

Naturally Green, Tree Shaped Matcha Madeleine Cakes

Naturally Green Holiday Cake Recioe | Matcha Madeleine Cookies

I am always amazed when I see bloggers and crafters getting into the holiday spirit in the middle of the summer.  Excluding brand collaborations, I definitely do not think that far in advance.  I was still eking out the last few pleasures of summer as late into the fall as I could.  Bonfires, sailing, sandals - that was my focus.  With the exception of today's delicious recipe!

I thrifted the most adorable tree-shaped mini cake pan during the summer and have been waiting for the holiday season to put it to use.  All fall I dreamed of a matcha-infused madeleine recipe.  When I won a photo contest at a local tea shop (3 of my photos will appear in their annual calendar), I used some of the $150 gift card I won and bought some delicious powdered matcha - but you can find it online, too.  These naturally green, tree-shaped mini cakes are so easy to whip up and they taste SO good.  Hubby and I actually invited neighbors over for a cup of tea and madeleines, because we literally couldn't trust ourselves not to eat them all in one sitting.     

Naturally Green Holiday Cake Recioe | Matcha Madeleine Cookies

Aren't they adorable?  The magic is in the cute pan I found for $1.00:

Naturally Green Holiday Cake Recioe | Matcha Madeleine Cookies

I couldn't find the exact one online, but I did track down a similar pan with trees and gingerbread people (hello, Grinches)!  No matter what kind of pan you bake these sweet treats in, they're sure to become a fast favorite!  If you're already drooling all over your laptop (guilty), here's what you'll need to bake these matcha madeleines.

Ingredients:
  • 2 eggs
  • Juice + zest of half a lemon
  • 1 tsp vanilla
  • 2 tbsp powdered matcha
  • 1 stick of butter (1/4 pound)
  • 2/3 cup sugar
  • 1 cup flour 
Supplies:

Naturally Green Holiday Cake Recioe | Matcha Madeleine Cookies

How to Make Matcha-Infused Madeleines:

I had read that making madeleines was tricky and, certainly, there were a ton of extra steps (like refrigerating the dough before baking, letting the eggs come to room temperature, etc) but I skipped them all because I didn't want my madeleine to have that signature hump; I wanted the trees to lie flat.  So these are the steps I followed, which was a quick and easy way to make madeleines that, to my taste buds, did not affect the tastiness one bit:

  1. Melt the butter in a saucepan over medium heat (I let it bubble so it was golden, then removed it from the heat and set it aside).
  2. Meanwhile, grease the pan well with butter.
  3. In a mixing bowl, using a whisk, whisk the eggs with the vanilla, lemon juice and lemon zest.
  4. In another mixing bowl, measure out the flour and matcha powder.
  5. Slowly add in the eggs to the dry ingredients, gently whisking.
  6. Add the melted butter and whisk until combined.
  7. Pour the batter into the greased pan, filling each section only half way.
  8. Bake at 350 degrees for approximately 15 minutes. 
  9. Let cool and lightly dust with matcha powder and icing sugar.

Naturally Green Holiday Cake Recioe | Matcha Madeleine Cookies

These are a breeze to whip up and yet they turned out so adorably well!  They are such a pretty shade of green and the dusting of icing sugar looks like snow.  Plus they taste amazing: really sweet and cakey, with just the mildest hint of matcha.  They're really delicious with a cup of tea.

Naturally Green Holiday Cake Recioe | Matcha Madeleine Cookies

If you loved my matcha shortbread, you'll love these.  Happy baking!   
Read more »
SHARE:

October 28, 2016

Easy Chocolate Raspberry Hand Pie Recipe

Chocolate Raspberry Hand Pie - So easy, so delicious | www.danslelakehouse.com

In another life, I'd be telling you, "I bought a bakery!"
  
Because I come from a family of diabetics, I've been increasingly interested in low sugar and sugar-free desserts and treats.  After moving back to my hometown and seeing all of the fabulous local businesses pop up and see success, I started dreaming about opening my own bakery and selling diabetic-friendly desserts.  I think there's a place in the market for a bakery like this because my Mummu just celebrated a birthday and when I called all of the bakeries in town to see if anyone baked a diabetic option, I was laughed at - seriously laughed at.  Actually, some folks were surprisingly rude and unprofessional on the phone, but others simply had no clue what kind of (healthier) alternative sweeteners are out there. 

I had been hoping to buy something because I had run out of time to bake myself, but on the drive into town I ended up coming up with a great diabetic-friendly cheesecake recipe on the fly, swinging by a grocery store, and just baking the cheesecake at her place.  She loved it!
  
Recently I found out that a small local Finnish bakery - building and all - is for sale.  Half Finnish myself, I grew up on the pulla sold there.  I started to daydream about renovating the building and re-opening, selling some of the old classics and some new diabetic-friendly treats (for anyone looking to cut back on sugar a bit - not just diabetics).  The downtown location, with a small (read: manageable) building, seemed perfect.  My family did some reconnaissance for me, finding out the asking price and if anyone else was interested, but I just couldn't commit.  What the heck do I know about running a bakery?  What the heck do I know about baking, beyond the treats I make for us?  What if I can't make a go of it and we lose our shirts? 

For now, I'm happy to bake at home!  But stopping by that Finnish bakery so often to scope it out ignited some cravings, so I whipped up some hand pies - just in time for a Wayfair pie contest!  I'm skipping the almond flour and stevia for today, because it was comforting to bake with familiar ingredients and treat myself a little to a flaky crust.  SO good. 

 
Here's a peek at the adorable chocolate raspberry hand pies I made:

Chocolate Raspberry Hand Pie - So easy, so delicious | www.danslelakehouse.com

I'm drooling.  These are incredibly tasty - and such a nice snacking size.  It's a great way to sneak pie into a brown bag lunch.

I make this chocolate raspberry pie as both a regular pie (double crust) and hand pie.  The measurements for the filling are different, so I've included both - basically, the hand pies require less fruit because the dough to filling ratio skews very much in favor of the crust.  This dough recipe will yield about 10 hand pies - but of course the number will vary depending on how large/small you make them.  You could also pre-cook the pie filling, but I just use the berries whole. 

Crust:
  • 3 cups white flour
  • 2 sticks + 3 tbsp chilled butter
  • 1-2 tablespoons sugar (2 tbsp is tastier, 1 tbsp if you're cutting back)
  • 1 tsp salt
  • 6-8 tbsp ice water (sometimes I add just a smidge more)
Filling: 
  • 5 cups raspberries, fresh or frozen (pie) | 1-2 cups raspberries (hand pie)
  • 3 tablespoons high quality cocoa powder (pie) | 1 tablespoon (hand pie)
  • 3 tablespoons sugar (pie) | 1 tablespoon (hand pie)
Other Ingredients:
  • 1 egg, beaten
  • 1 tablespoon sugar
Kitchen Accoutrements:

How to Make a Pie Crust in the Food Processor:

Do you make your pie crust in the food processor?  Learning that trick was life changing for me.  If you've never tried it, it's simple: just toss the flour, salt and sugar into a food processor.  Chop up the chilled butter and pulse with the flour, using an "S" blade.  When the flour and butter is blended roughly and the butter has been broken down into pea-sized chunks, add the ice water.  Pulse until the dough starts to stick together and then pull out onto a floured board and knead quickly and gently, forming the dough into two discs.  I wrap mine in plastic wrap and refrigerate for two hours (or overnight).  So much easier than working the dough by hand, plus it's handled less so the dough stays nice and flaky. 

How to Make an Easy Chocolate Raspberry Filling:

To make my filling, I simply toss my cocoa powder (I try to buy good quality) with my raspberries and sugar so the raspberries are coated lightly.  That's it!  I started doing this one day when I was out of my usual pie filling thickener so I was rooting around for some other kind of powdery ingredient in my cupboard.  The chocolate raspberry pie turned out so tasty, I added this to my pie rotation.  The juice released from the fruit creates a tasty chocolate sauce with the cocoa powder, and it's laced with raspberry flavor and sweetened lightly.
  Chocolate Raspberry Hand Pie - So easy, so delicious | www.danslelakehouse.com


How to Make a Hand Pie:

Hand pies started as something I made with leftover pie dough, but now I'm loving them enough to bake a whole batch because the crust to filling ratio definitely skews on the side of caaaarrrbs.  Once I roll out my dough per usual, I cut out shapes using a giant cookie cutter or just cut out a basic rectangle with a knife.

Chocolate Raspberry Hand Pie - So easy, so delicious | www.danslelakehouse.com

I lay down the bottom piece of the pie on my floured surface, brush the edges with my egg wash, and add a small dollop of filling in the middle.  Then I cover it with the top layer of my pie cut out and press the edges closed with my fork, crimping them closed.  Finally, I brush the surface with an egg wash and sprinkle with some sugar.  I bake these at 350 degrees for about 30 minutes, until golden brown.  I check at the fifteen minute mark and rotate my baking sheet because my oven doesn't heat super evenly.

These chocolate raspberry hand pies are so, so good!  Not too sweet and not too rich, with a really satisfying chocolatey fruity filling.  Plus there's more flakey crust in ever bite than a normal pie, so it's really satisfying.  Plus they are easy...as pie to make (couldn't resist).

So how is this a pie contest, exactly?  

Well, it's pretty relaxed - and no taste test, sadly:  the blogger with the most comments and social engagement on their pie post wins! 

So I'd love it if you would leave me a note and tell me what your favorite pie filling is - or try to guess what I was planning to name my bakery.  It's SUCH a good name, it's a real shame not to use it.
 Chocolate Raspberry Hand Pie - So easy, so delicious | www.danslelakehouse.com

This post is sponsored by Wayfair, but all thoughts and opinions are my own.  
Read more »
SHARE:

October 6, 2016

Easy Homemade Gummy Candies, with NO Added Sugar

In my quest to create reduced sugar or sugar-free desserts and snacks - you know, when I'm not inhaling pumpkin spice s'mores - I stumbled across the wild and wonderful world of homemade gummies!  Did you know you can make your own gummy candy and keep it as sugar-free as you want?  Look at the adorable, gold-dusted gem gummies I made:


Almost too pretty to eat!  Almost.


Here's what you need:

*When choosing a fruit juice, just skim the ingredients to make sure there isn't any pineapple, mango or papaya juice because these juices will prevent the gelatin from setting unless the juice has been boiled.   Also watch fruit juice labels for added sugar and artificial color, if that's a concern for you.


How to make gummy candy:

Warm up the juice on the stove in a pot and once it's warm - not boiling - stir in the tablespoon of the gelain and whisk until it's dissolved.  Add the stevia and whisk until it dissolves, then pour into a silicone mold.  I used a small brush to dust mine with gold first.  I also put my silicone mold on a cutting board so it's easier to maneuver.  (Alternatively, you can double the recipe and pour into small glass bowls - it's the perfect consistency for that as well.)

Pop into the fridge for a few hours and, voila!  Gorgeous gems!  Perfect for a rock hound like me.


I've been experimenting with different liquids, methods and flavor combinations - including an orange chocolate gummy that is so delicious - but my homemade gummies keep getting eaten before I can properly photograph them!  I got about five minutes with these.  They're looooong gone.

I wanted to share because this easy homemade gummy candy is a good starting off point for anyone wanting to experiment; this "recipe" is foolproof. 


Have you made your own gummy candy before?  Any delicious recipes I should try?  Next time I'll share a few of my favorite concoctions  in one post - seriously, you'll need to try that chocolate and orange one. 
Read more »
SHARE:

September 30, 2016

Pumpkin Spice S'mores + A Night Around the Campfire

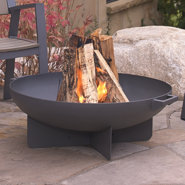
The DIY welded fire pit Hubby and I made earlier this year might be my favorite project to date because it made our summer way more fun!  We definitely used our fire pit so much more this year than previous summers because it's infinitely more inviting now.  Sometimes I'm kind of jealous of the insanely expensive, elaborate and gorgeous landscaping and decks other bloggers have - I feel like a real country bumpkin with my janky dock, janky gasoline shed and leaning flag pole.  But the green eyed monster never stays long - I'm just so grateful for our hilarious little gravel pit because I'm no longer sitting with the grass tickling my ankles (ticks!).  Really, it's the little things.

DIY Fire Pit
Lake Sunset with Sailboat

If you've been reading the blog or following me on Instagram for awhile, you might have gleaned that I feel a bit lukewarm about fall.  Sure, the changing leaves are beautiful, but fall signals the end of summer (my favorite season) and the dreaded arrival of winter (my least favorite season).  Until the snow flies, I'm still hanging on to summer as best I can!  Hubby and I are still sailing until the club forces us to haul out and we're enjoying as many lake sunsets as we can before they disappear.  Luckily our new fire pit is huge, so I can build a real rager to keep warm on chilly fall nights.

Modern Metal Fire Pit DIY
Roasting S'Mores
Campfire with S'mores

When Wayfair invited me to share my ideal evening by the campfire, I jumped at the chance to make some s'mores and hang out by the lake - taking you with me as best I can!  You have only seen the fire pit in its pristine, just-made state so I thought it would be fun to show you how we really use the fire pit and how it's weathered the summer - plus share some take home tips and products (including some for my apartment dwelling or fire pit-less friends).

Fireside Fun

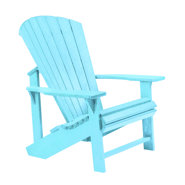
You probably spotted that the Eames chairs I had in front of the fire pit moved to the guesthouse after I painted the trim turquoise.  They looked so good lakeside but I quickly realized two problems: they filled with water when it rained and when we had friends and family over, we had to add some mismatched chairs and we were tired of lugging chairs back and forth.  Instead, we moved the Eames chairs to the sheltered guesthouse deck, where they are perfect for overnight guests to chill with a coffee alone (or handy extra seating by the lake if we need it).  For the fire pit, we lugged down our patio chairs, which were languishing in the garage because we only use two on the deck (we positioned the patio table so people can sit on the built-in deck benches on one side).  I'd love a set of turquoise Adirondack chairs, but I'm worried we won't be able to see the fire pit once we're sitting lower - something folks with similar, walled fire pits have complained to me about.  We can see every last ember perfectly, so for right now we're making do with the chairs we have because they're so comfy (and we already owned them, so the price was right).

Lakeside Fire Pit Lake Life
Roasting S'Mores

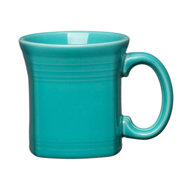
When we use the fire pit, it's too often a full spread!  We create a makeshift table, bring out a pot of tea with ceramic mugs, but then panic and use melamine plates for snacks.  S'more ingredients and pre-cooked sausages are stored in covered containers so we can feast, but the flies can't.  We camp out (pardon the pun) all night, often eating dinner beside the fire pit too - like the day we snapped these photos.  Hubby doesn't love marshmallows like I do, so he'll often heat up some pre-cooked sausages as a snack, which is something my diabetic Dad appreciates too.


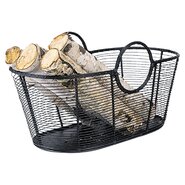
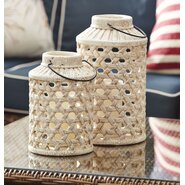
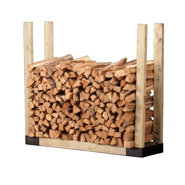
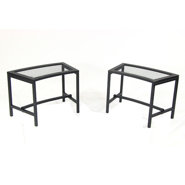
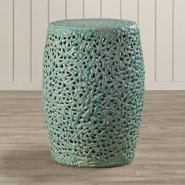
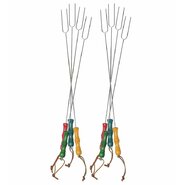
Now that we've really used our fire pit area, I have a list of things I want for next year, including a couple of garden stools to use as side tables beside the chairs, real s'mores roasting sticks (Szuka chews the ones Hubby lovingly whittles for us), a nicer container for carrying/storing firewood (we leave our janky wheelbarrow parked nearby), some pretty outdoor lanterns for when we're out way past sunset, and campfire tongs (we both reach in like idiots).  And maybe those Adirondack chairs after all!

Lake Fire Pit

One of the best parts about hanging out by the fire pit is the s'mores.  Did I mention s'mores yet?  I really have no idea what is wrong with Hubby and his marshmallow loathing.

Would you pick a sausage over a roasted marshmallow??? 

Marshmallows

In the last year or so I've been trying to really reduce my sugar intake and I've experimented a lot with low sugar and sugar-free baking, but I just love s'mores so much.  They are my weakness, my downfall.  I used to make them inside in the winter, in front of our wood burning fireplace, which cracks Hubby up.  I recently decided to try making them in the oven - which turned out to be SO easy (oh dear).

Because they're so easy to whip up, I've been experimenting with new flavor combinations.

Peanut Butter S'Mores

Among my favorites: peanut butter cookies or ginger spice cookies in lieu of graham crackers (to the latter, I add a sprinkling of pumpkin pie spice too).

Ginger Spice Cookie S'mores

In case you ever looked at a s'more and thought, "that's not enough sugar!" caramilk bar squares instead of plain chocolate make a ridiculously delicious treat - just be careful because the caramilk can get scathingly hot in the oven s'more variety, but they're just right fireside.

Caramilk Bar S'mores
Caramilk bar s'more

My current favorite is a pumpkin pie s'mores.  I'm not even a PSL fan, but I bought some canned pumpkin for smoothies because I'm trying really hard to embrace fall this year and do all of the things fall-loving folks love: wearing boots too early (I wear sandals till it snows usually), eating copious amounts of pumpkin, and decorating in an autumnal fashion.

I tried a dollop of canned pumpkin in an oven s'more with a sprinkling of pumpkin pie spice (probably a little too fussy to assemble fireside).  SO delicious!  Starting to get what the fuss with fall is all about...

Oven S'mores

I just pop two graham crackers in the oven at 350 degrees Celsius for 5 minutes (or until the marshmallow swells a bit and starts to look toasty).  Then I sprinkle on the spice, add a teaspoon of pumpkin puree and close the s'more quickly to let the pumpkin warm up.  It's super addictive, so I really don't recommend trying this at home...

Pumpkin Spice S'mores
Pumpkin Spice S'more
Pumpkin Spice S'mores

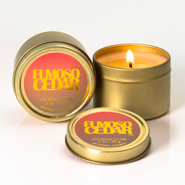
I wanted to share this tip because I know so many of you are apartment dwellers or can't have a fire pit (or frankly, don't want one because it takes days to wash the smoke smell out of hair - I totally get it).  If you're skipping the fall campfires but crave that cozy ambiance, I recommend lighting a campfire scented candle, and bundling up with a blanket, mug of tea and an oven s'more! 

Turquoise Mug

Really, any excuse for a s'more.

This post was sponsored by Wayfair, but all thoughts, opinions, product selections, and s'mores tangents are my own.  Thanks for supporting the brands that make blogging possible for me - I can't tell you how much I appreciate you as readers!
Read more »
SHARE:
© Dans le Lakehouse | All rights reserved.
See What Inspires Me on Pinterest